
Buildings:
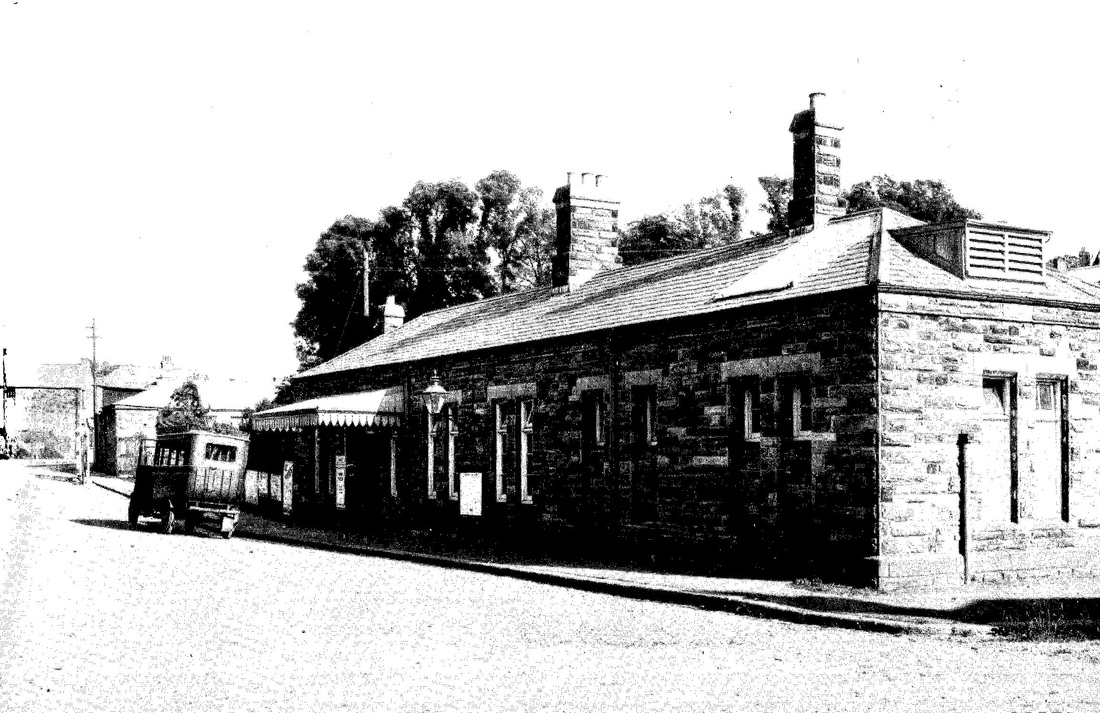
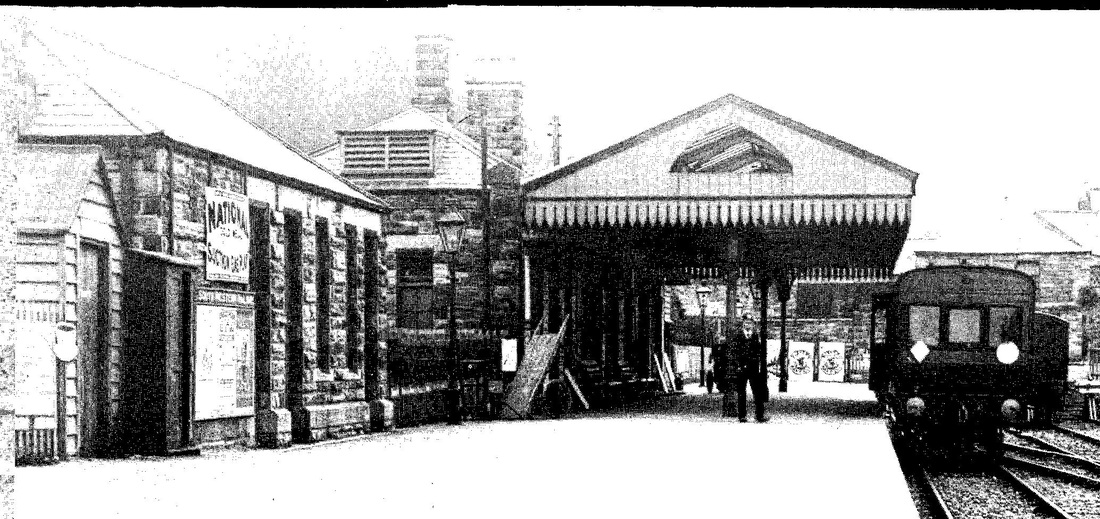
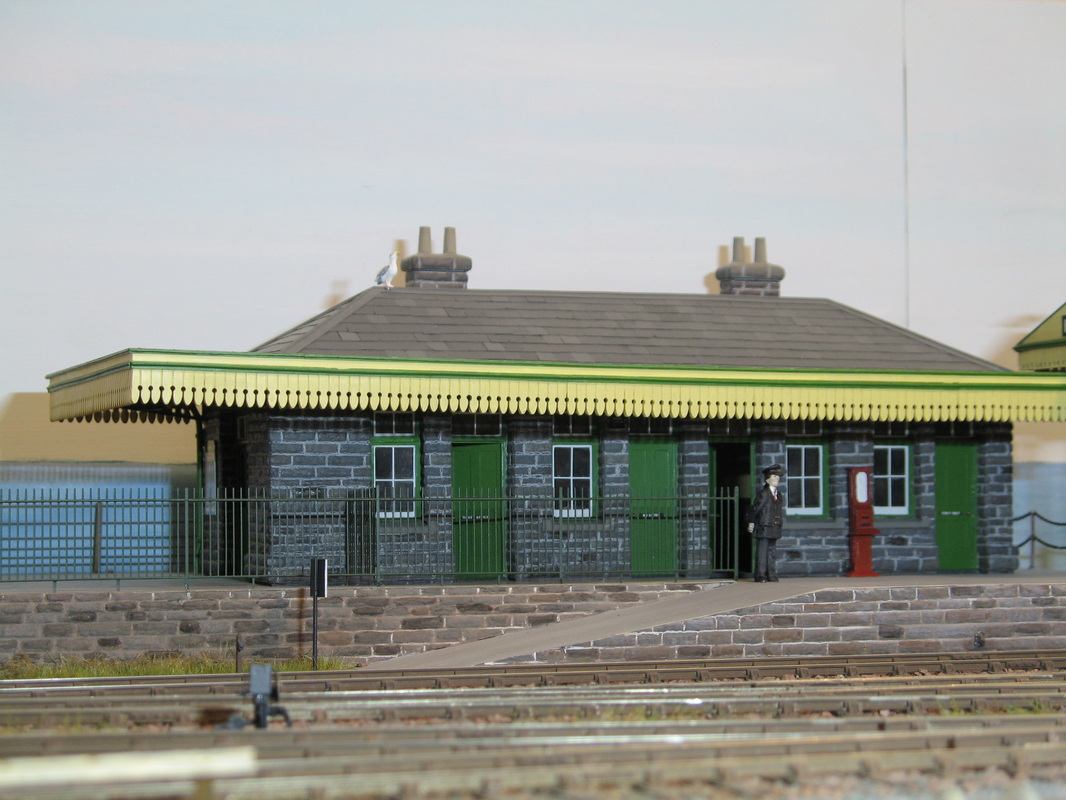
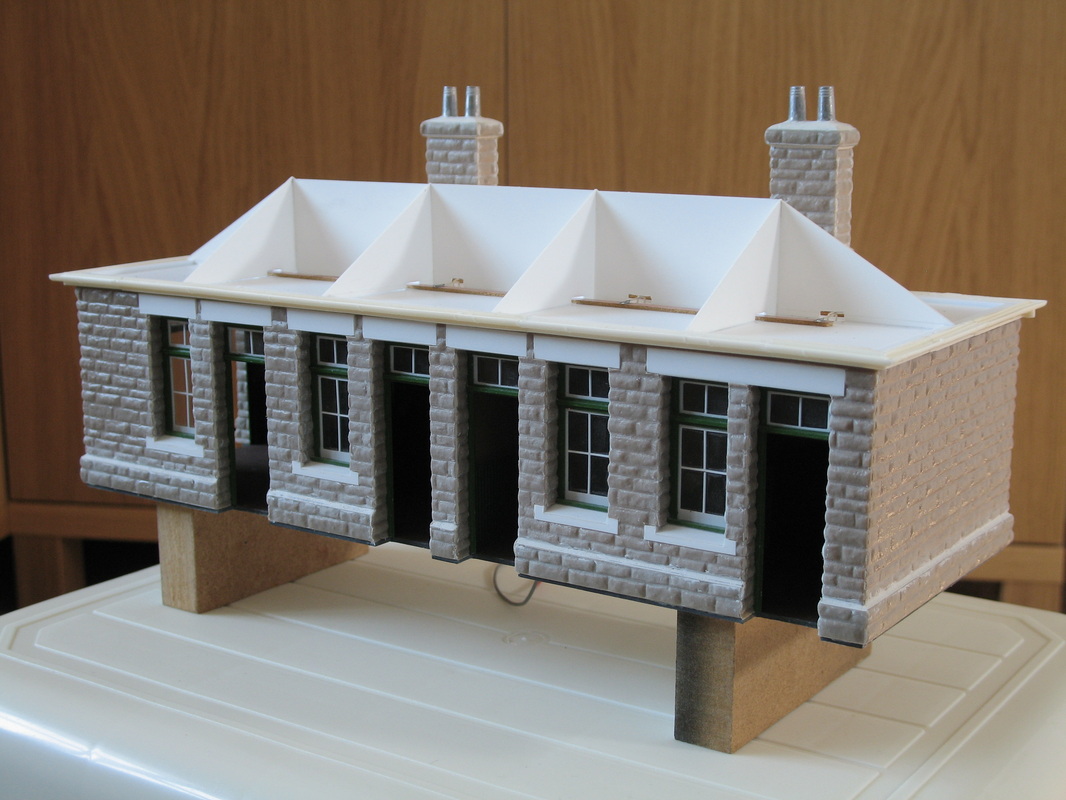
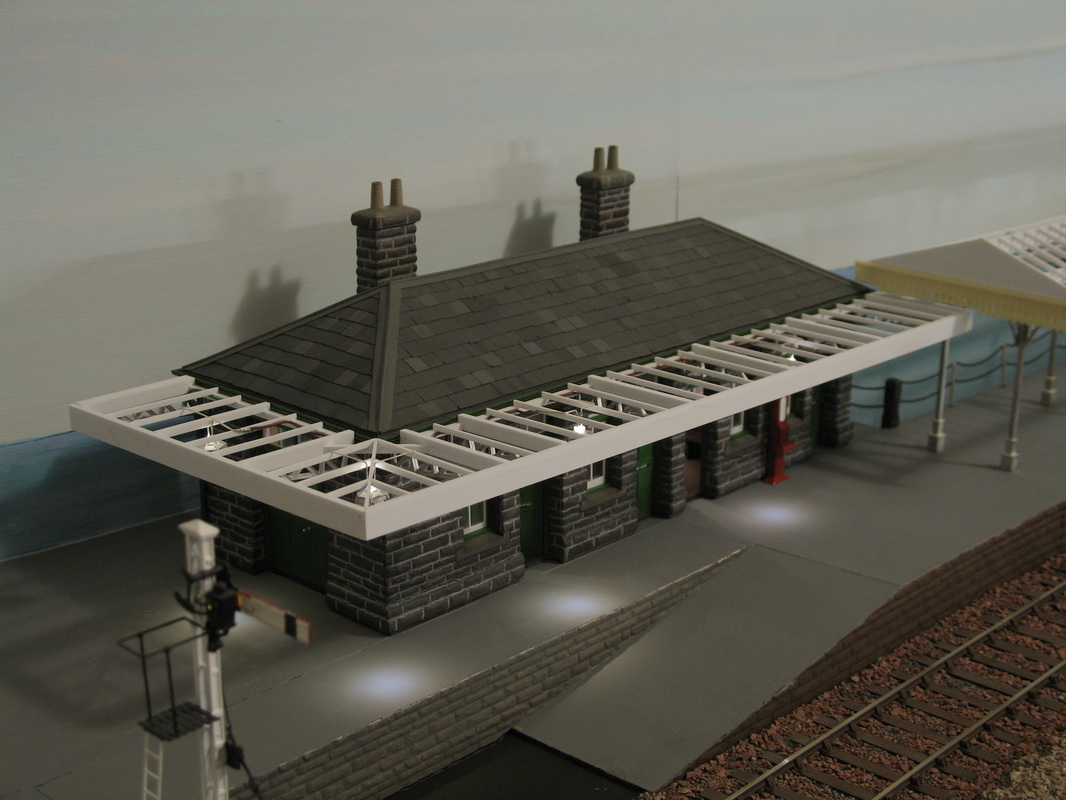
Station Building: The Station Building is based on ‘Bodmin North’ (actually only part of
it) and adjusted to fit the space. I wanted a small building so as not to dwarf the platforms and also didn't want a "half relief" building that disappeared into the backscene as, to my eyes, this rarely looks right on layouts unless the end view can be obscured, which in my case it couldn't.
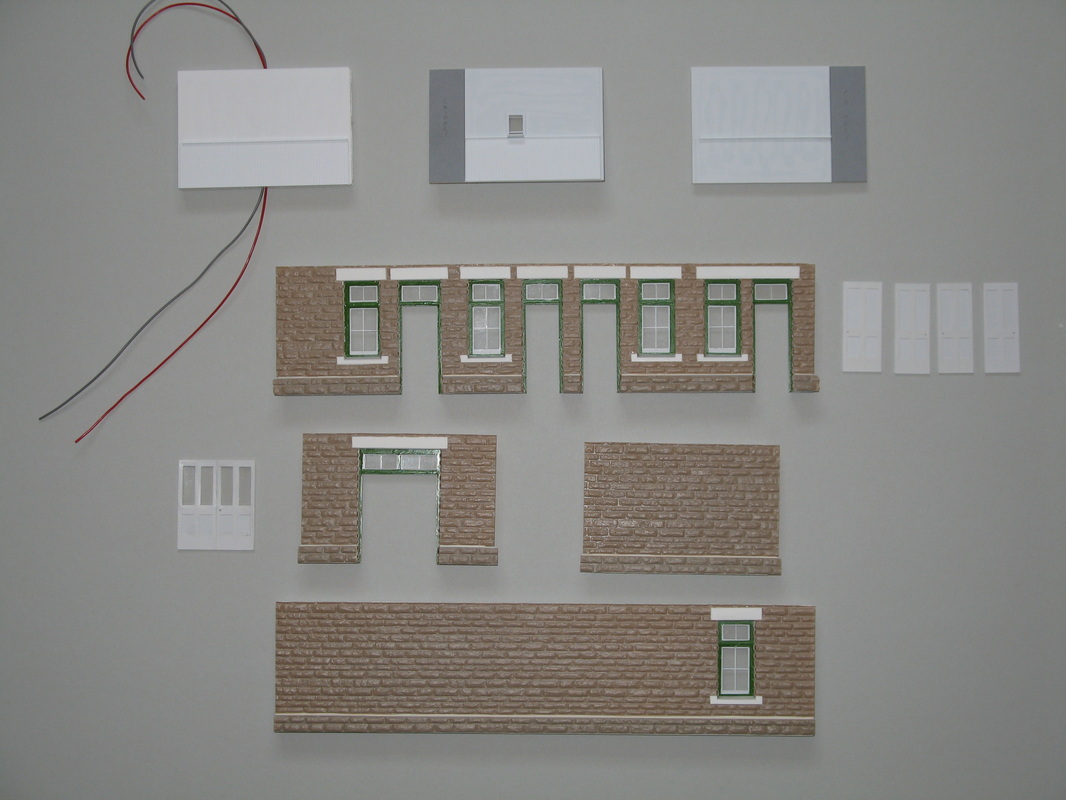
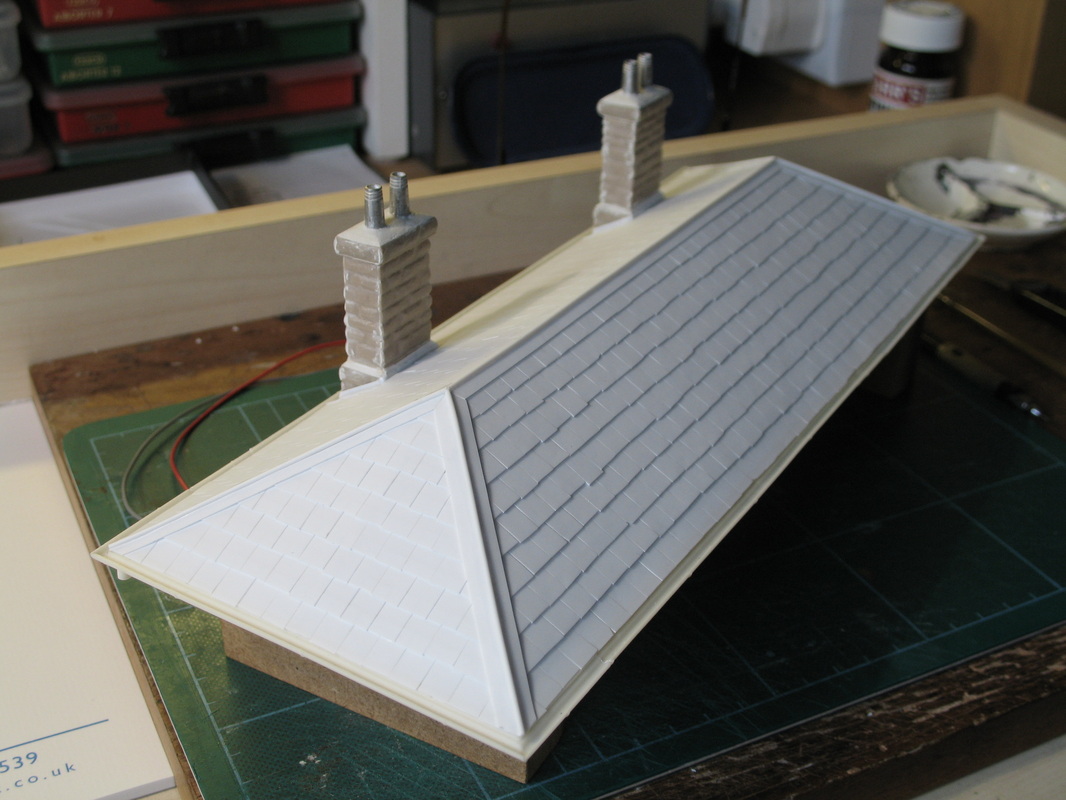
Construction is from foamboard covered with ‘Slaters’ embossed plasticard, particular care being taken around window and door reveals to make sure the courses ran correctly. The roof is a plasticard shell covered with individual 10 thou. plasticard slates. Windows are clear styrene sheet with the glazing bars and frames made up from layers of ‘Evergreen’ strip of various sizes.
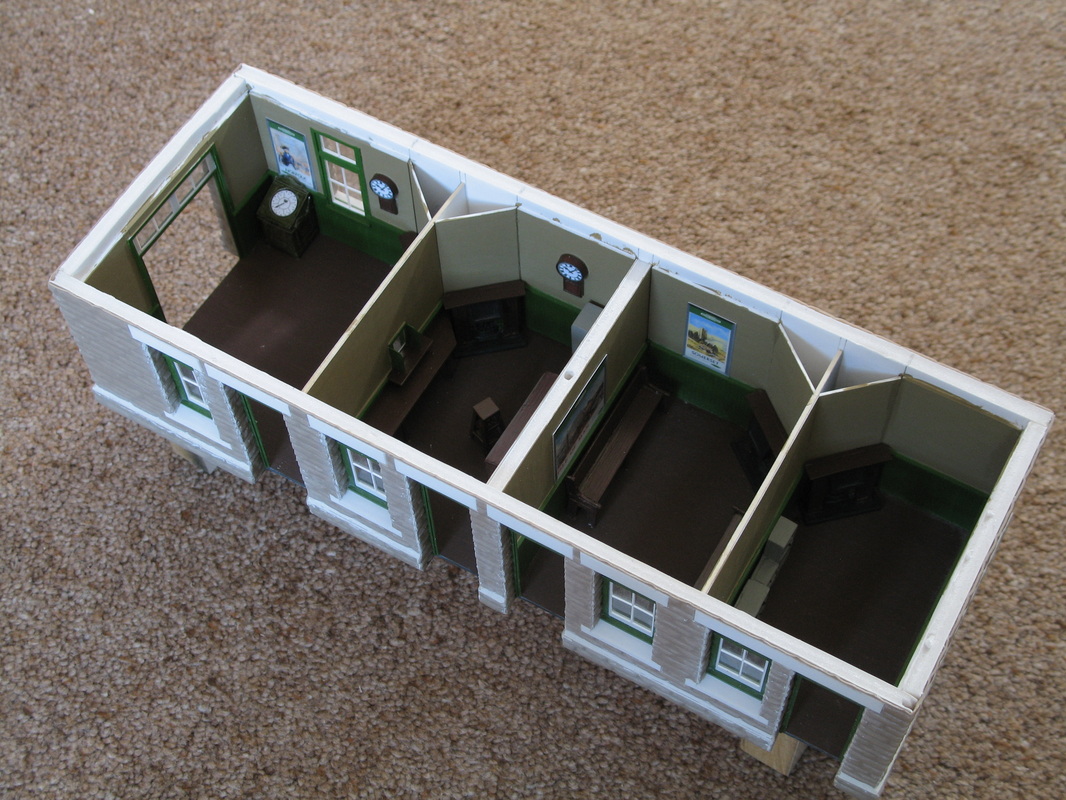
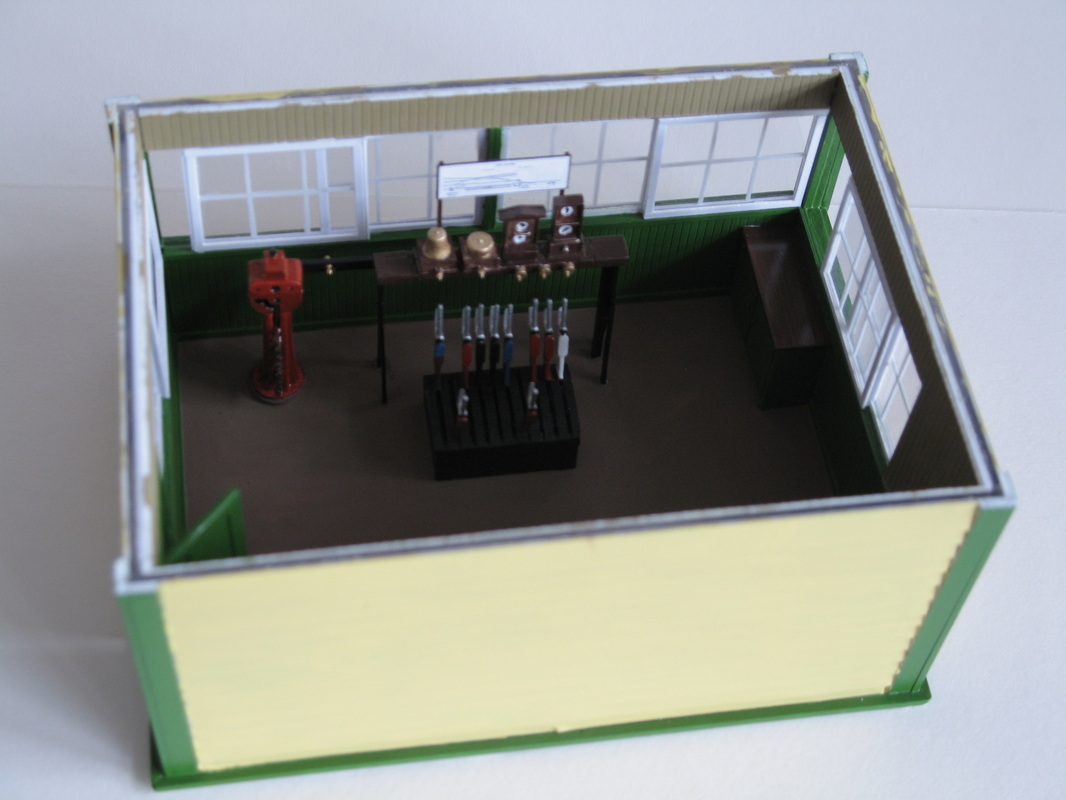
The building also features full internal detail and is lit (using LEDs) to help you see it!
Construction is from foamboard covered with ‘Slaters’ embossed plasticard, particular care being taken around window and door reveals to make sure the courses ran correctly. The roof is a plasticard shell covered with individual 10 thou. plasticard slates. Windows are clear styrene sheet with the glazing bars and frames made up from layers of ‘Evergreen’ strip of various sizes.
The building also features full internal detail and is lit (using LEDs) to help you see it!
|
|

|
|
|
|
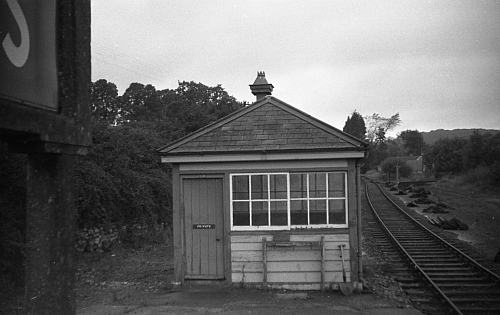
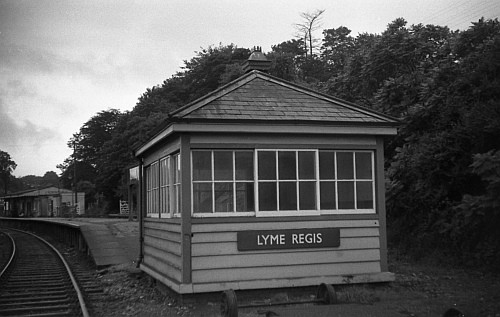
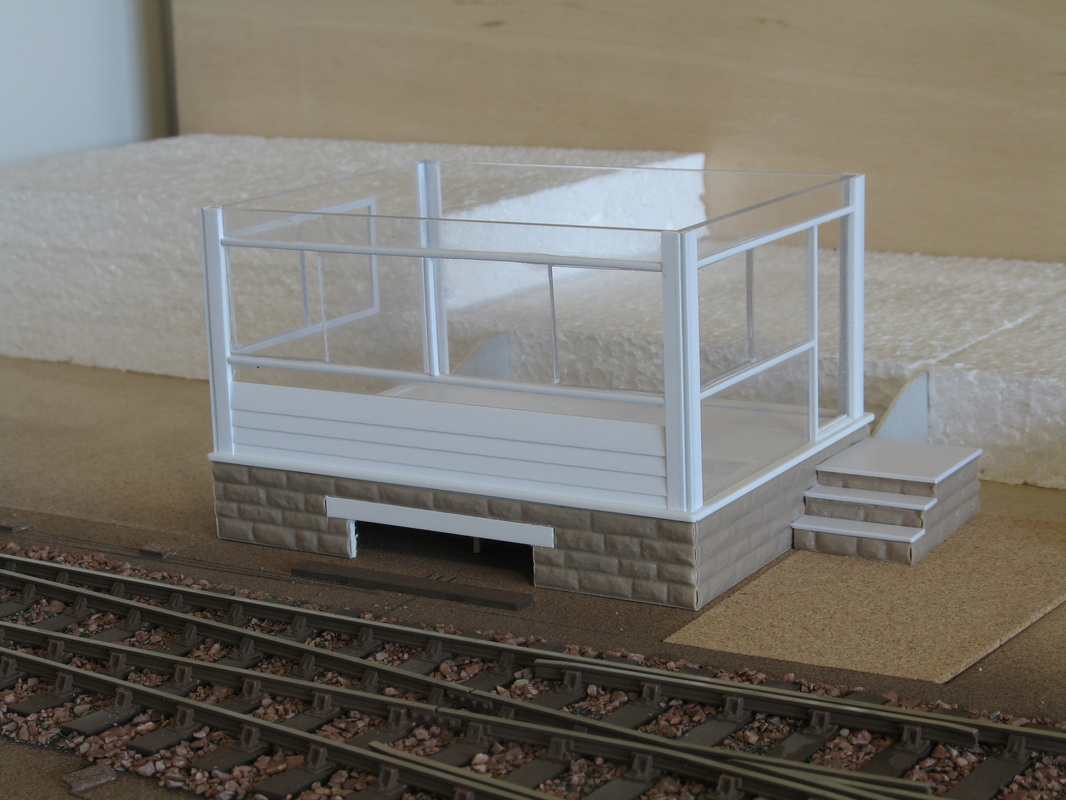
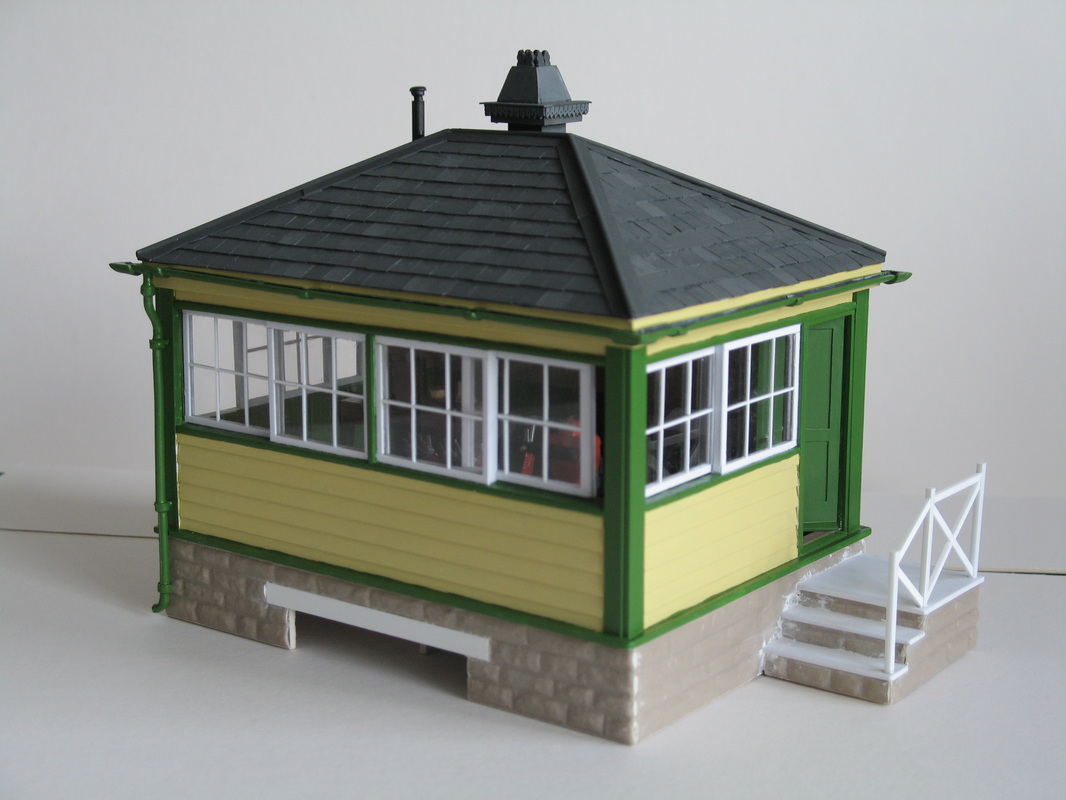
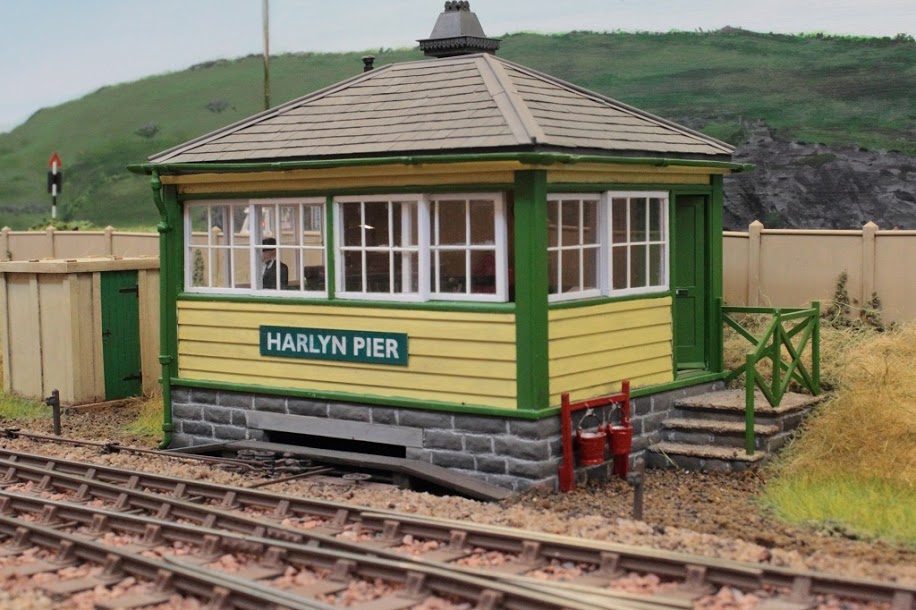
Signal Box: The signal box is a mix of Budleigh Salterton and Lyme Regis but built as a mirror image.
It was constructed as a Perspex box and then clad with ‘Evergreen’ strip for the shiplap boarding and all the timber framework, window frames, glazing bars, etc. The roof is once again a plasticard shell covered with individual 10 thou. plasticard slates. The distinctive ventilator on top was scratch-built from plasticard and odds-and-ends from the scrap box!
The interior is fully detailed and illuminated once again using LEDs.
|
|
|
|
|
|
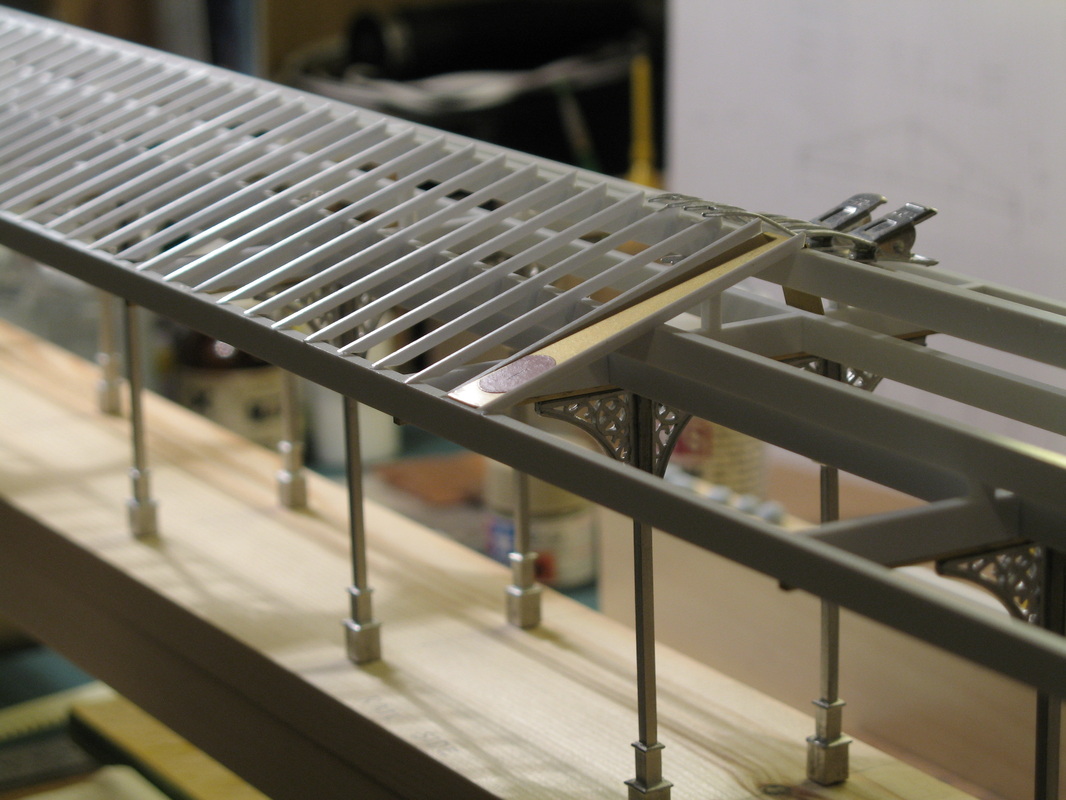
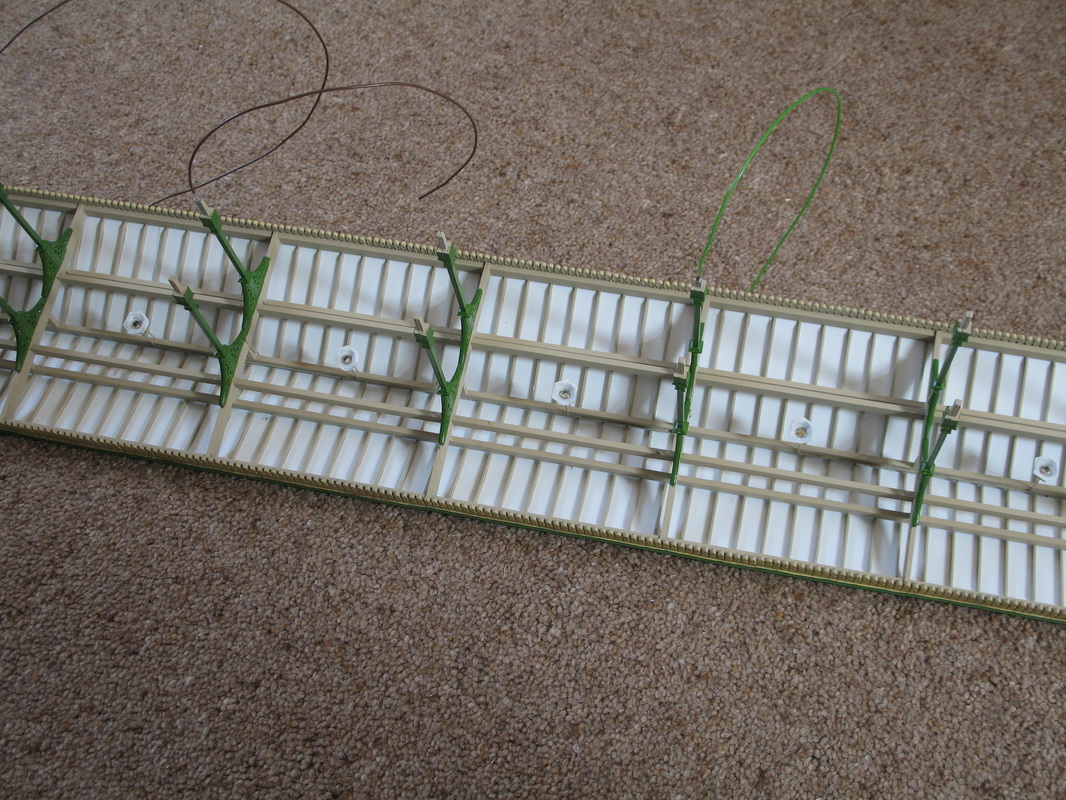
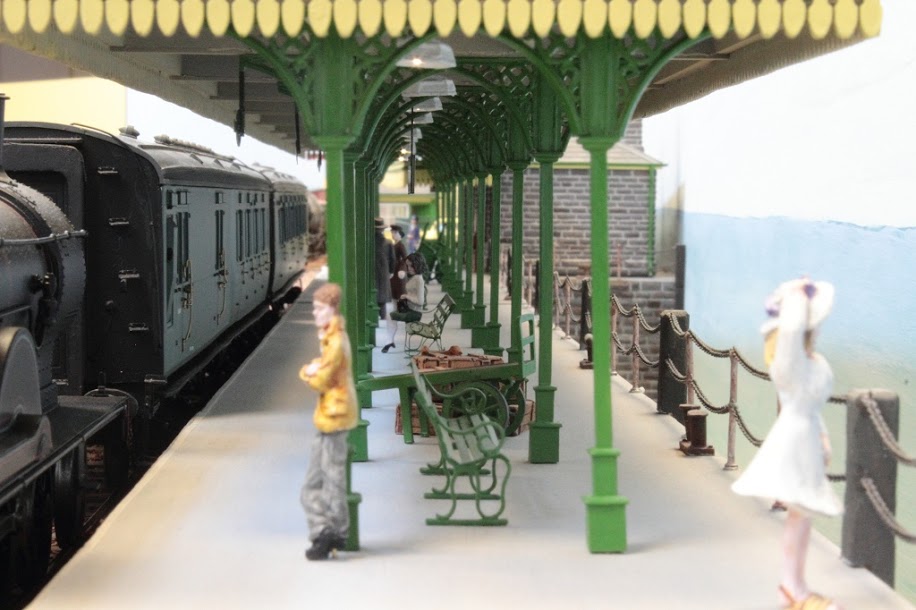
Station Canopy: For the canopy on the platform I went for a freelance design but based on photographs of Lymington Pier (for the
width and double row of columns) and Camelford (for the pitched roof and gable ends
to give a South Western flavour).
It was constructed using ‘Skytrex’ columns, brackets and valancing, assembled on a jig. The roof framework was made up using various sections of ‘Evergreen’ strip, including fitting all the individual rafters. The roof covering is from ‘Evergreen’ seamed metal roof sheets. ‘Skytrex’ SR platform lamps were drilled and fitted with LEDs and then mounted below the roof timbers to try and achieve “pools” of light on the platform surface.
It was constructed using ‘Skytrex’ columns, brackets and valancing, assembled on a jig. The roof framework was made up using various sections of ‘Evergreen’ strip, including fitting all the individual rafters. The roof covering is from ‘Evergreen’ seamed metal roof sheets. ‘Skytrex’ SR platform lamps were drilled and fitted with LEDs and then mounted below the roof timbers to try and achieve “pools” of light on the platform surface.
|
|

|

|
|
|

|
|
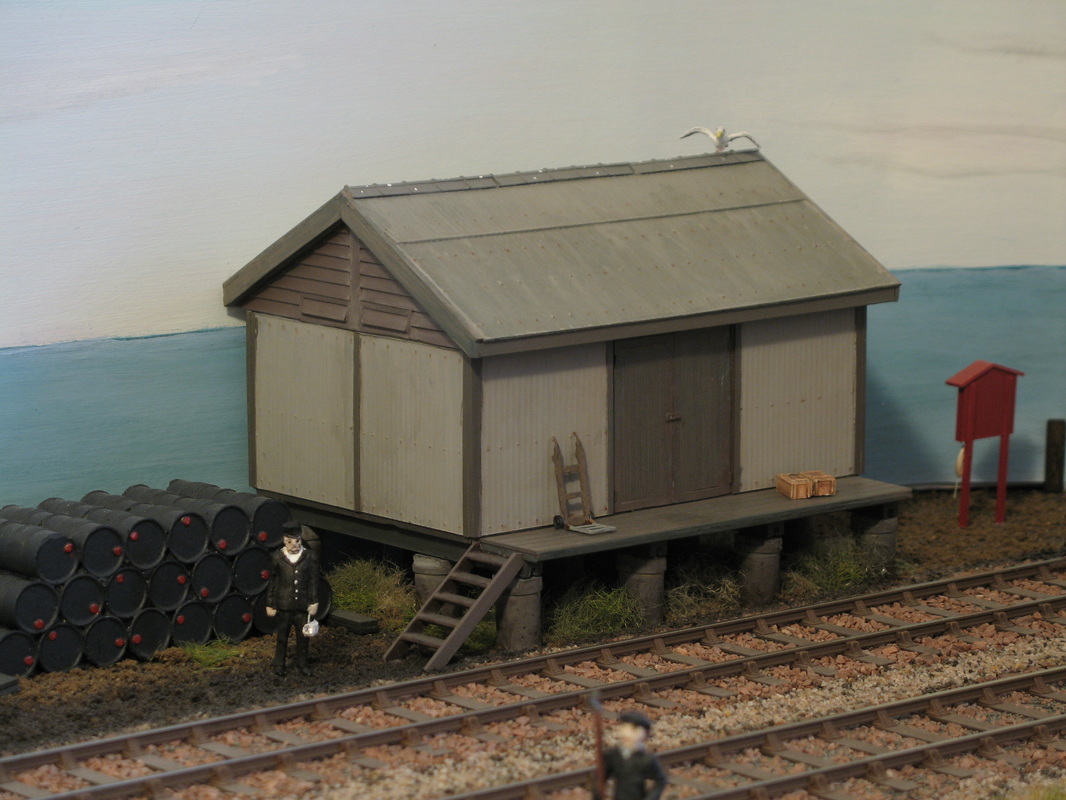
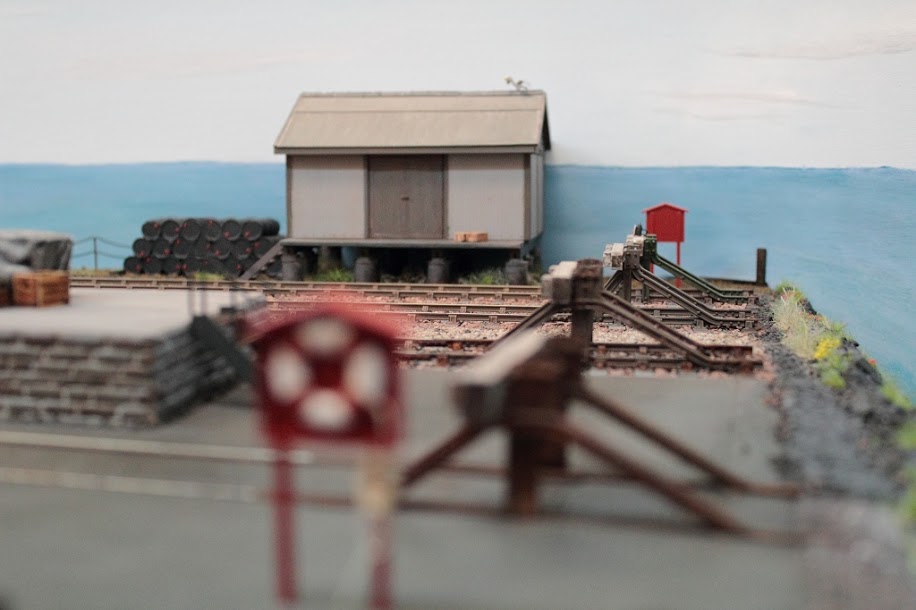
Store Building: The only other building of note is the store beyond the far end of the platform. This is presumed to be for luggage and goods held for loading/unloading onto the ferry when it arrives.
It is constructed from a 'Skytrex' SR provender store kit but altered and reduced in size to kit the available space.
It is constructed from a 'Skytrex' SR provender store kit but altered and reduced in size to kit the available space.
|
|
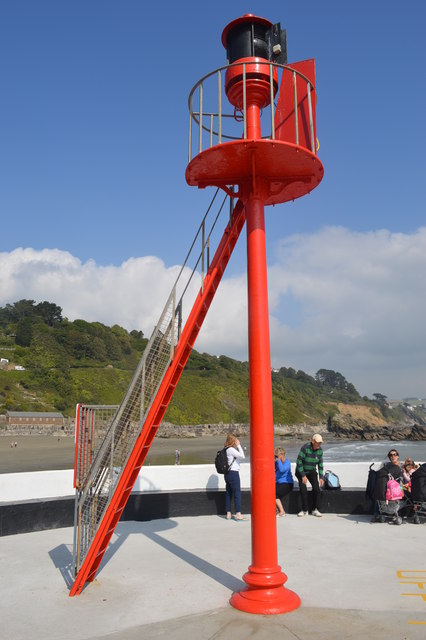
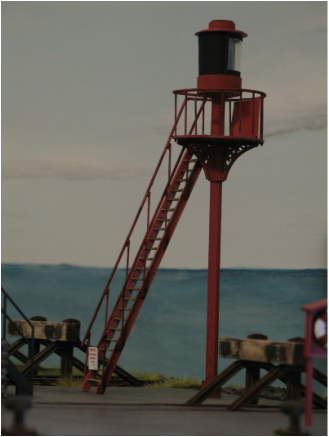
Harbour Light: I'm not sure if this qualifies as a building but I'll tell you all about it anyway! I wanted something as a bit of a feature at the far end of the quay and whilst a lighthouse would have been nice it would have been much too tall! Some searching on the internet by my mate Rob uncovered what appear to be known as "port lights" (I think) and a picture of the one on the end of a pier at Looe in Cornwall seemed to fit the bill.
Well, having a picture was one thing but I then had to build it! Some rough scaling of the photo gave me a size to work to and a visit to the scrap box for all sorts of odds and ends including hexagonal brass bar, various nut, washers, plasticard, wire and a plastic bottle cap resulted in a most satisfying scratch building exercise.
At this point I was asked "well, aren't you going to make it flash"? Okay, in for a penny etc..... An LED was fitted inside the light housing together with a "blind" so it didn't make puddles of light on the backscene. Rob then pulled his master stroke and produced a "Lighthouse Simulator" - a 'Pocket Money Project' from MERG (Model Electronic Railway Group) - you have to be a member to get it. It makes the LED emit a series of flashes (like the lamp of a lighthouse appears to do) and you can select from several different flash sequences - a visit to the Trinity House website helped me decide how many flashes to have!
So there we have it - a flashing harbour light at the end of the quay. Thanks Rob!
|
|
Signals & Level Crossing:
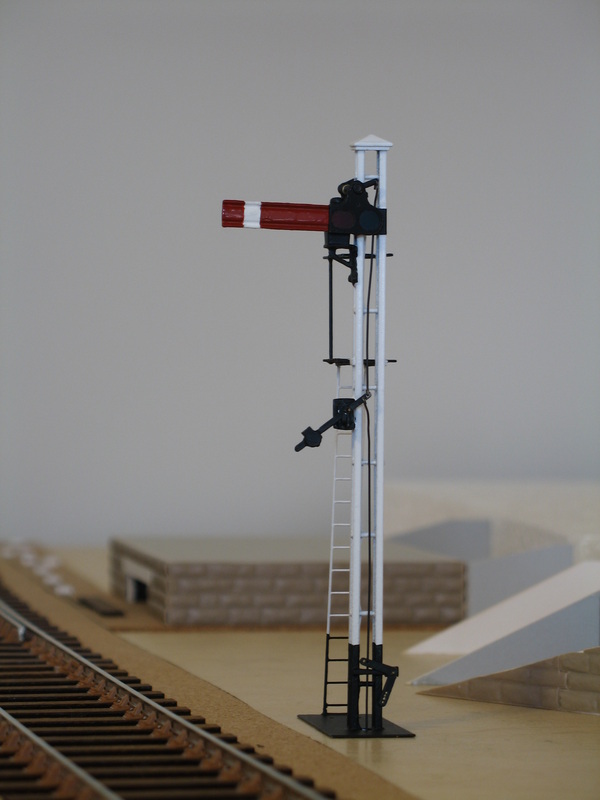
Signals: There are only three signals on the layout; the starter signal and two ground discs:
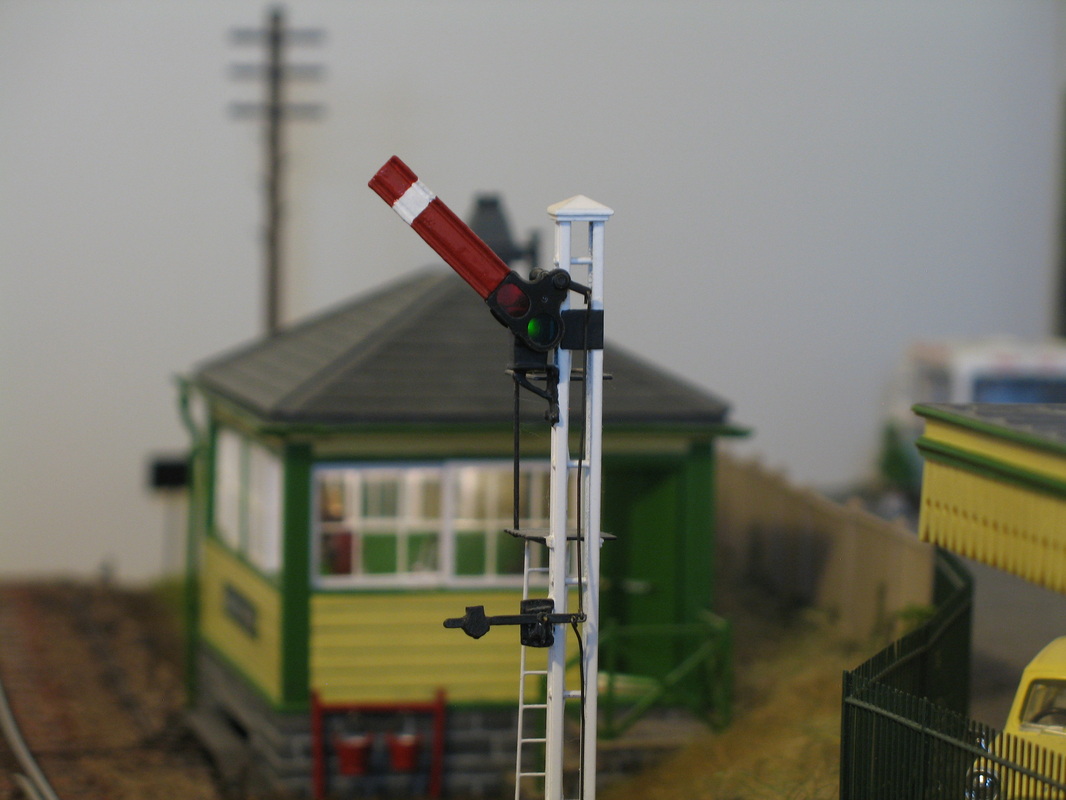
The starter is a Southern Railway rail built signal and was constructed using a mixture of 'Scale Signal Supply' and 'Model Signal Engineering' components with some 'C & L' bullhead rail thrown in for good measure. It is illuminated using an LED as described in an article by Derek Mundy from the February 2011 issue of the Gauge 0 Guild Gazette.
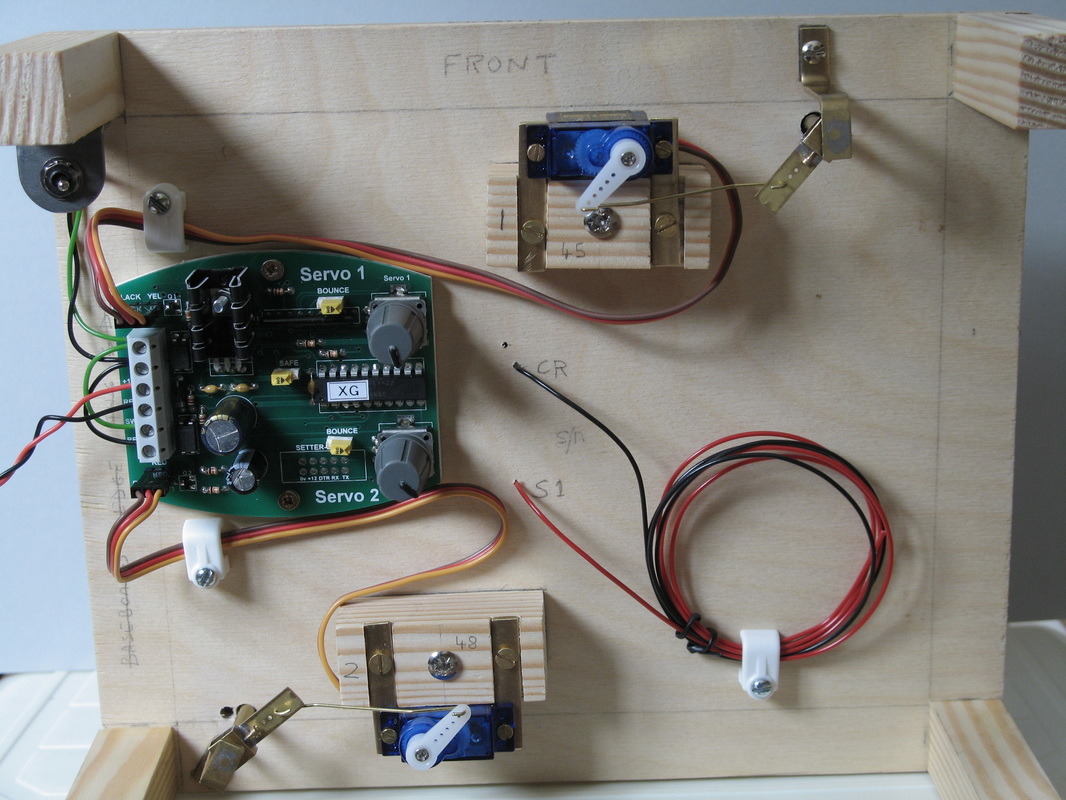
The signal is operated by a servo mounted on the underside of the baseboard. The servo is controlled from a 'GF Controls' Dual Servo Control unit which allows you to control the throw of the arm and also introduce "bounce" when the arm returns to danger. An excellent product that makes controlling signals a doddle!
The signal operation is interlocked to the points and level crossing using the internal switch on the point motor and a relay. This was done to try and ensure that we only get the signal to clear when all is set correctly and then don't forget to return it to danger after the train has departed. Any errors in this regard are still down to the operators however as nothing is fool-proof!
The starter is a Southern Railway rail built signal and was constructed using a mixture of 'Scale Signal Supply' and 'Model Signal Engineering' components with some 'C & L' bullhead rail thrown in for good measure. It is illuminated using an LED as described in an article by Derek Mundy from the February 2011 issue of the Gauge 0 Guild Gazette.
The signal is operated by a servo mounted on the underside of the baseboard. The servo is controlled from a 'GF Controls' Dual Servo Control unit which allows you to control the throw of the arm and also introduce "bounce" when the arm returns to danger. An excellent product that makes controlling signals a doddle!
The signal operation is interlocked to the points and level crossing using the internal switch on the point motor and a relay. This was done to try and ensure that we only get the signal to clear when all is set correctly and then don't forget to return it to danger after the train has departed. Any errors in this regard are still down to the operators however as nothing is fool-proof!
|
|
The ground signals both operate and are illuminated - a right fiddle it has to be said! Once again a mix of 'Scale Signal Supply' and 'Model Signal Engineering' components were used together with 2mm LEDs for the illumination.
Operation is by servos once again controlled via the aforementioned 'GF Controls' unit for one signal and a 'Heathcote Electronics' Single Servo Motor Controller unit for the other.

|


|
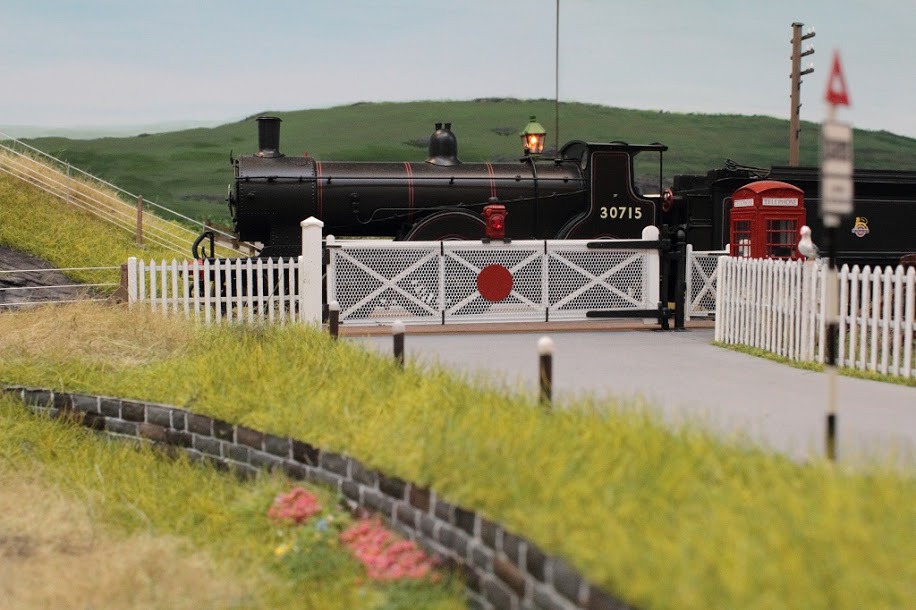
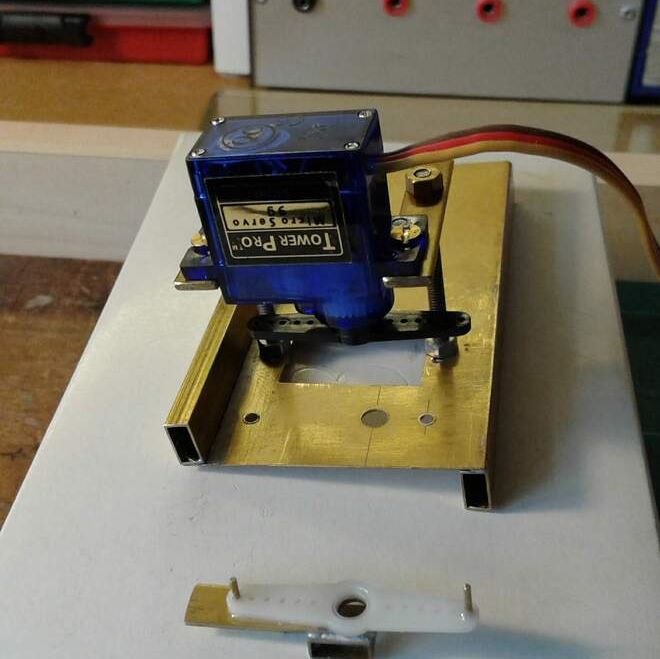
Level Crossing: The level crossing is constructed from a 'Crossing Gates Models' kit. It was built on a square of plywood sized to drop into a similarly sized opening in the baseboard once completed. This made construction of the crossing, setting up the operating levers, servos, etc. and getting it all adjusted much easier.
Control is once again courtesy of 'GF Controls' and their Crossing Gate Control unit which allows adjustment of the gate swing and sequences the opening and closing of the two gates. All down to clever electronics which is beyond my understanding, but the instructions are clear and precise so I had no problems in making it all work!
After a couple of years use some slack developed in the levers and the acute angular pull was causing the gates to snatch rather than open and close smoothly. I decided an even pull was required so rebuilt the mechanism with gear wheels to connect the gate spindles to the servos. This was quite successful except that I couldn't get the gear wheels firmly enough attached to the servos (and still be able to remove them if needed) and they would work loose over the course of a two day show. Back to the drawing board again!
I've now rebuilt it again with the servos driving directly onto the gate spindles. Hopefully the pictures below will make it clear and also show the evolution of the design. Hopefully it will be third time lucky and the gates will behave reliably from now on.

|
|

Under construction - much easier off the layout.

Second mechanism - gears worked loose.
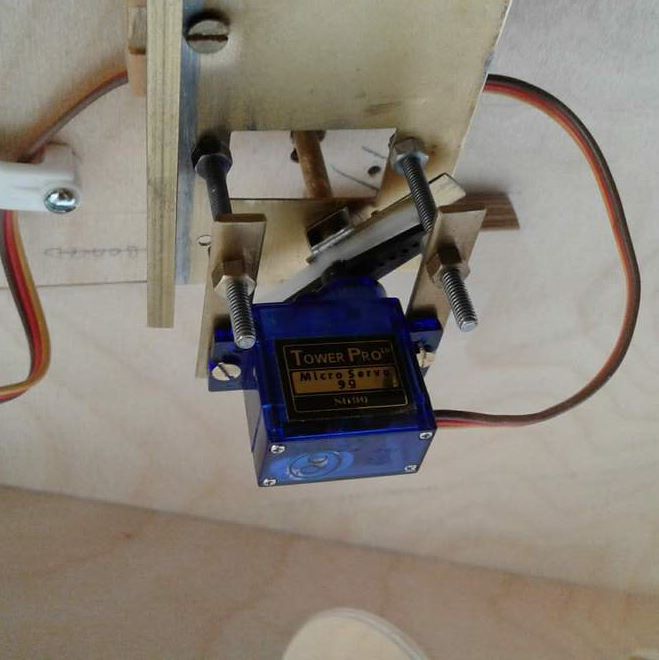
Third attempt - fitted direct to gate spindle.
|
First mechanism - ultimately not too successful.
Third attempt - under construction.
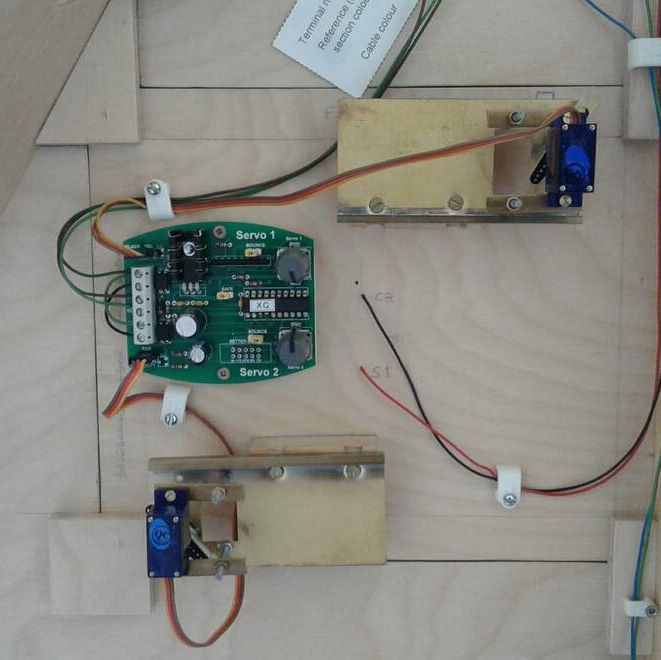
All installed and working.
|
